Dec 11, 2014
· Updated: November 2, 2025
· 4 min read ·
Share on:
Using a NetScaler within home lab is beneficial, mostly because you can use the same IP over and over for different services. Imagine providing VPN, Lync Autodiscover, Exchange Autodiscover, and SharePoint all over port 443. That's what a NetScaler VPX can do for you, for free.
Below is a tutorial that will help you get started with NetScaler. For everyday admins who haven't done this before, it takes some time to understand, but here are a few important things to note:
The NetScaler VPX is free, but you have to get a license and renew it annually. The license just requires you pasting in your FlexNet Host ID (which you get from command line later on in a tutorial), downloading the license, then uploading the license to your VPX.
You will need to allocate at least two IP's to your NetScaler. One to manage from (MIP), and one subnet IP (SNIP). This subnet IP isn't a subnet mask, it's just another IP within the subnet that allows your NetScaler to monitor the servers within the subnet. In my lab, my management IP is 10.0.0.10 and my subnet IP is 10.0.0.11. If you forget to set your subnet up, your monitors will fail, and everything will show as down.
Scroll down to the middle until you see Download. I downloaded: NetScaler VPX for ESX 10.5.e.
Once the file has finished downloading, extract it to C:\temp. Keep this tab open, we'll return to it later.
Deployment & Basic Configuration
Figure out what IP you'll give your NetScaler, then add it to your local DNS.
Deploy your OVF
Don't Power On after Deployment
Right-click VM -> Edit Settings -> Remove Network Adapter 2
Right-click VM -> Upgrade Virtual Hardware
Power on
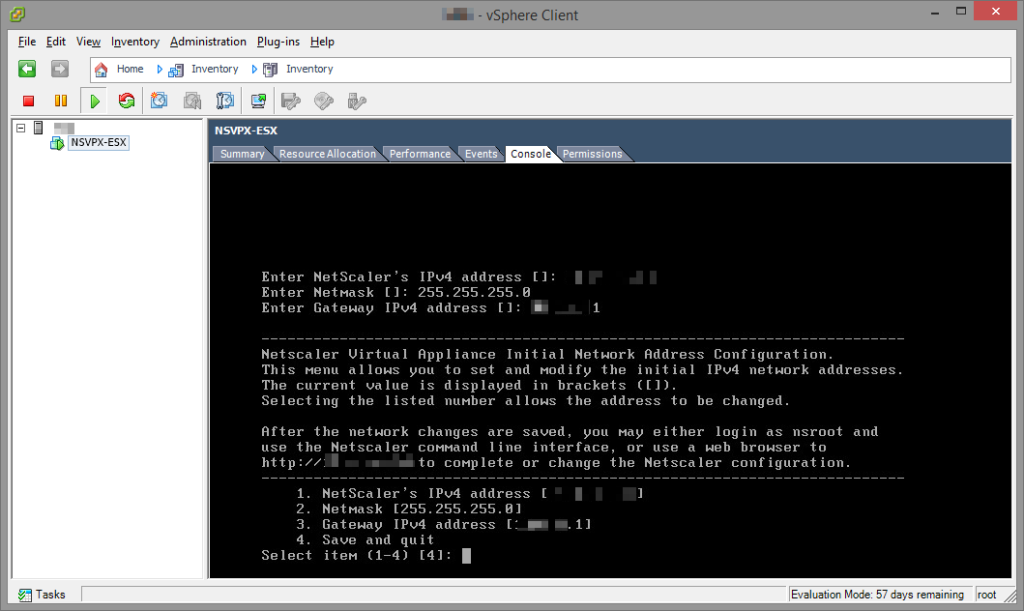
Wait for the NetScaler to boot up, then enter in your IP information.
Open up a new tab in your browser, and load up your NetScaler by IP or hostname. My DNS is netscaler.ad.local, so I point to https://netscaler
Login with nsroot and password nsroot
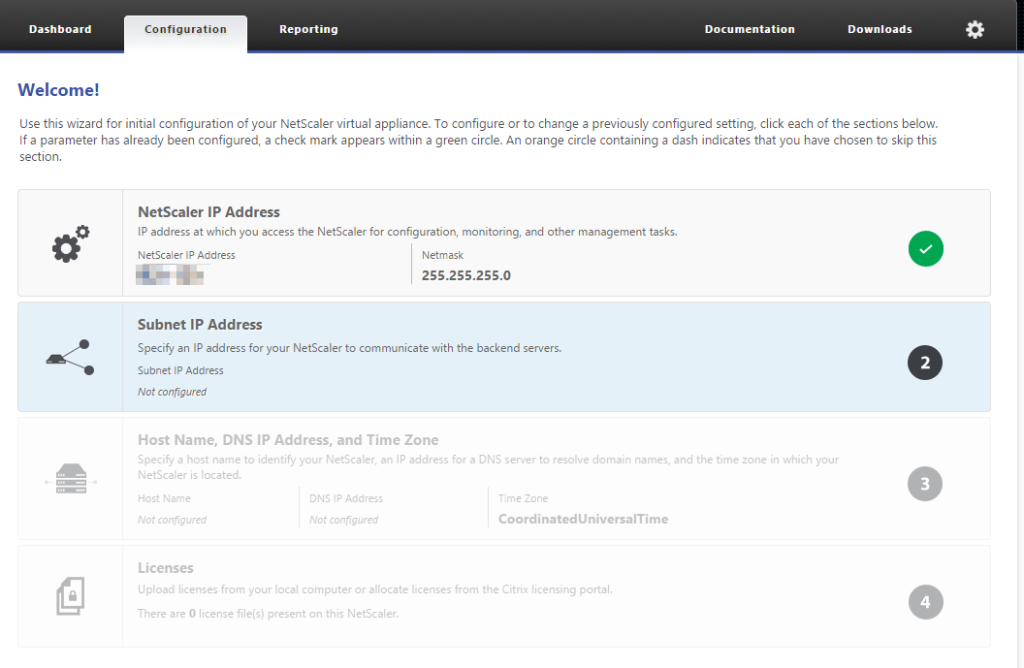
Next, you'll be prompted to enter a few things: Subnet IP address, Host/DNS Server/Time Zone and License. Again, my Subnet IP is just the next available IP within my subnet (MIP: 10.0.0.10, SNIP: 10.0.0.11)
License
Once you're finished entering your SNIP, hostname/DNS/Time Zone, we need to do two things: 1. Get to the licensing page within your browser and 2. Get the host information needed to download your license.
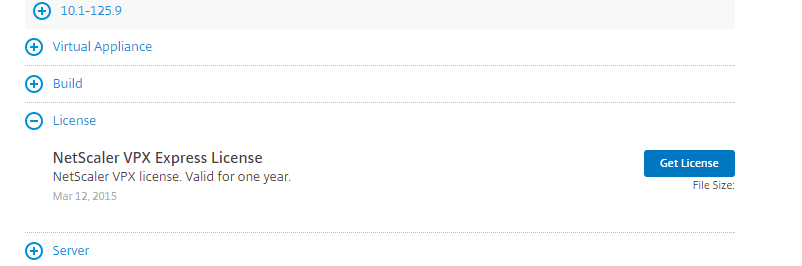
Go back to the Citrix browser tab I referenced not closing in the first section, and scroll down a little more to License. Expand the + and click Get License.
Then click Allocate License.
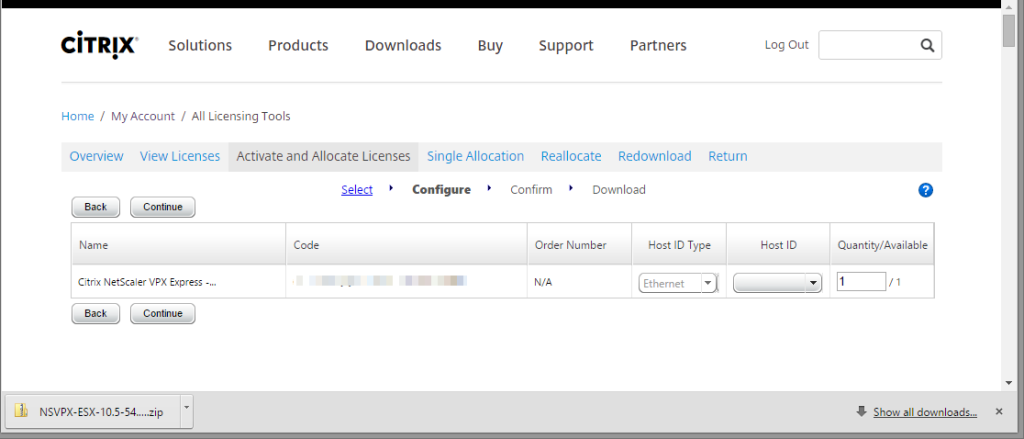
Next, you'll see a popup with your serial number. Click the serial number, and you'll be brought to the license allocation page. Click Continuewhen prompted.
See that blank Host ID? We need to go get it from the NetScaler.
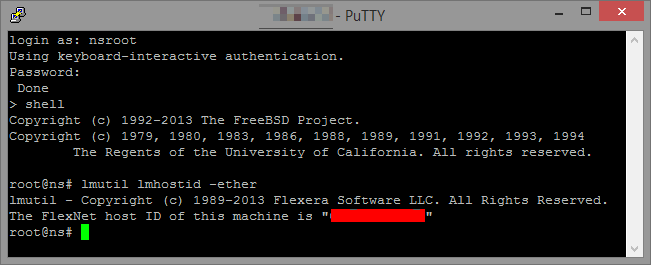
Fire up putty and connect to your NetScaler via SSH. This is required to get the information needed for your license.
Login with username nsroot and password nsroot
Type shell and enter.
Once at the shell prompt, type lmutil lmhostid -ether
Copy the FlexNet Host ID and go back to your browser. Paste it into the form box titled Host ID
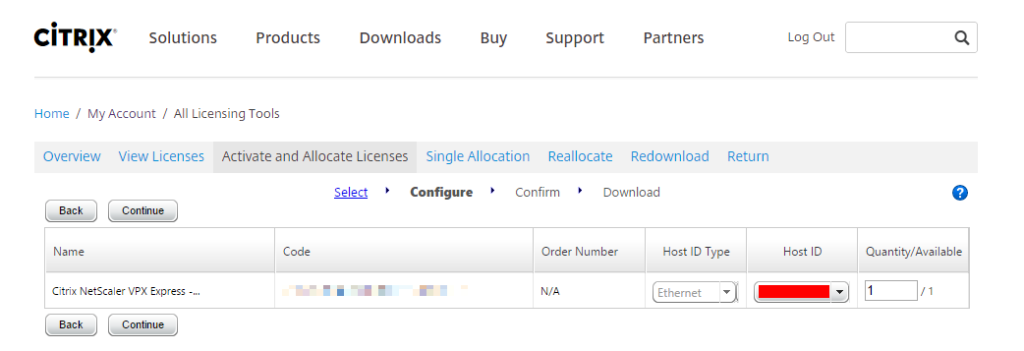
Go back to the Citrix tab and paste that Host ID.
Click Continue -> Confirm -> OK
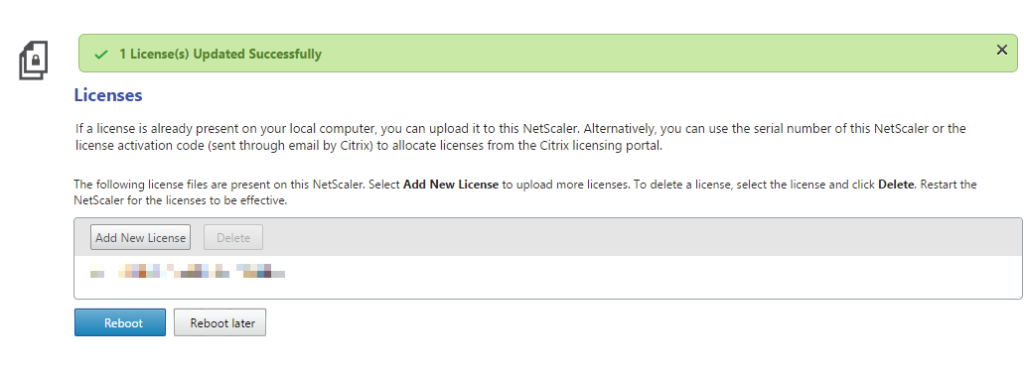
Your license will be downloaded and saved as a .lic file
Back to your NetScaler tab (https://netscaler), upload your license.
Click reboot
Now that your license is setup, and you've rebooted, HTTPS will work! Login to your netscaler via HTTPS and change the nsroot password: System -> User Administration -> Users -> nsroot -> Change Password.
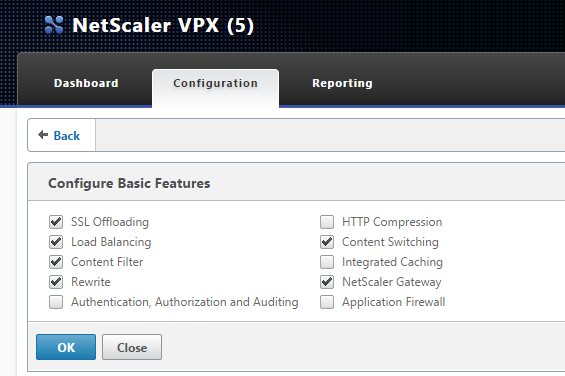
Now enable some features: System -> Settings -> Configure Basic Features, then check all these boxes:
Optional: Configure Advanced Features -> Web Logging, IPv6 Protocol Translation, EdgeSight Monitoring, AppFlow, Responder, vPath.
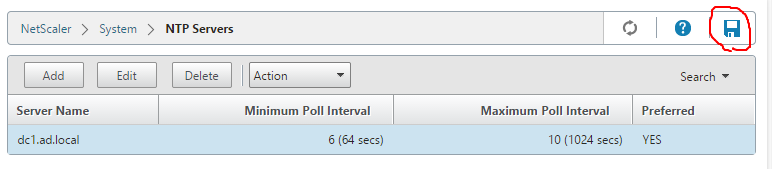
Since the VPX is a virtual machine, it's prone to time drift. Add an NTP Server to ensure AD authentication will work if you eventually set it up. System -> NTP Servers, add your DC's NTP server. Once you're done, hit Save*. * Hit Save a lot. I once lost a few hours worth of configuration because I forgot to save and the machine shut down unexpectedly.
Optional: If you'd like to replace the SSL cert on the web management interface, use this tutorial which is way easier than the method Citrix provides.
In the next post, Using NetScaler VPX in your Home Lab, I'll demonstrate how to use Content Switching within NetScaler to support a number of services over one SSL port/IP. It may be a little while, though.