Securely Administer Your Remote Windows Network using RDP over SSL
Back in 2013, I wrote a blog post about setting up RD Gateway in Windows 2012 using an AD domain certificate. This post is directed to Windows 2012 R2. There isn't much difference, but in this tutorial, I'll demonstrate how to setup RD Gateway with a globally recognized SSL certificate.
Like my previous post about setting up an SSL VPN on Windows 2012 R2, I strongly suggest you forego self-signed and even Enterprise AD certificates, and just use a certificate from cheapsslsecurity.com. This prevents non-domain devices from having to install your CA's root cert. Getting a legitimate cert can take as little as 5 minutes, costs just $5.99 per year and can be obtained in 12 easy steps.
Overall, there are three major steps to getting this going:
- Obtain and install your SSL certificate
- Install & Configure RD Gateway
- Setup your client.
Install the SSL Certificate
Step 1
Follow my tutorial for getting a legit $5.99 cert, down to creating the .pfx file.
Remember to use the external hostname of your RD Gateway server. Say, for example, rdgateway.acme.com instead of rdgateway.ad.local.
Step 2
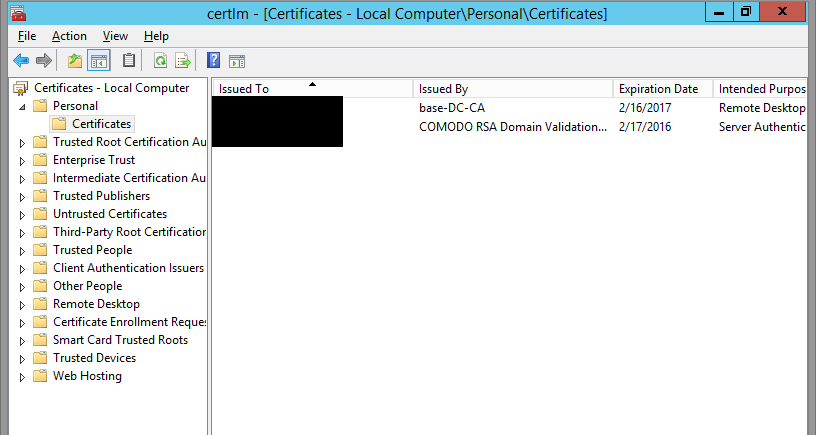
Import your PFX to the local machine's Certificate store. To do this, certlm -> Personal -> Certificates -> Right-click, All Tasks -> Import -> Next -> Select your Cert -> Enter your password -> Next -> Finish.
Install and configure RD Gateway
Step 1
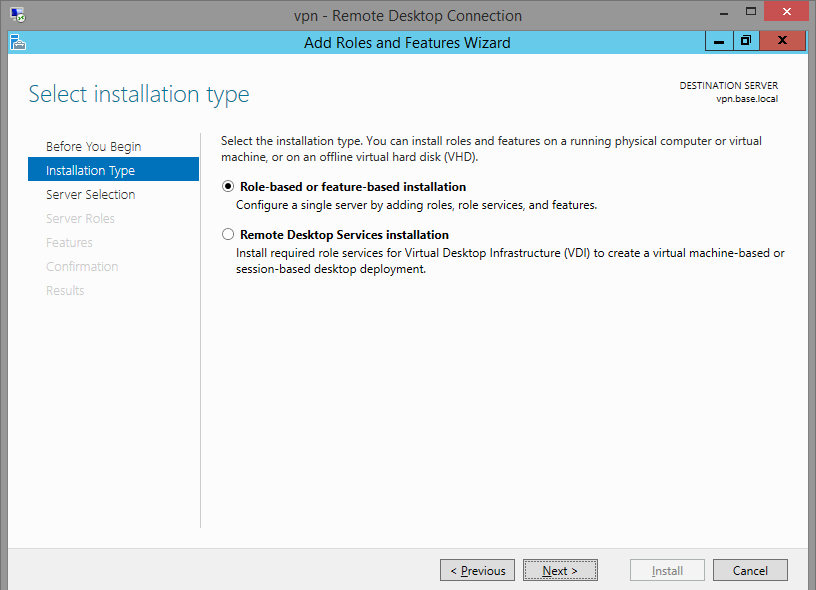
Add the Remote Desktop Services role. Server Manager -> Manage -> Add Roles and Features
-> Role-based or feature-based installation.
You will be tempted to check the other one, but don't. That's for virtual desktop deployment.
Step 2
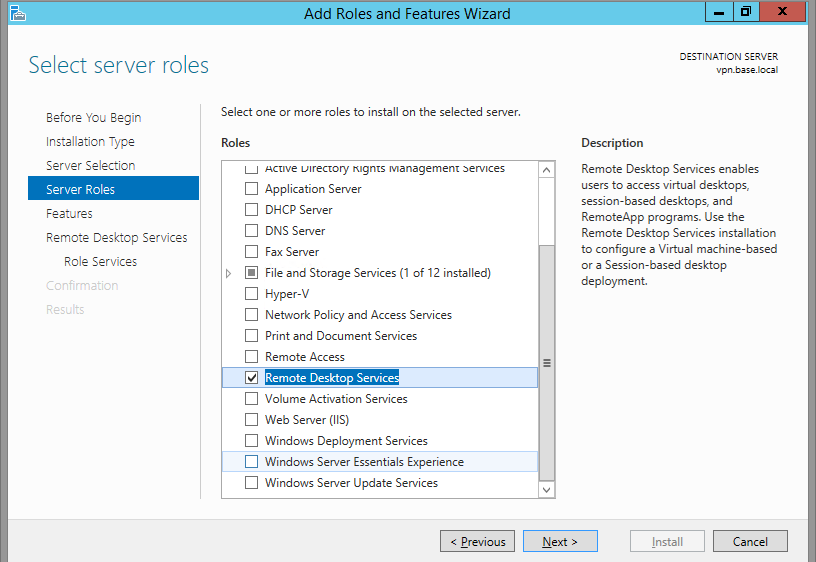
Click Remote Desktop Services.
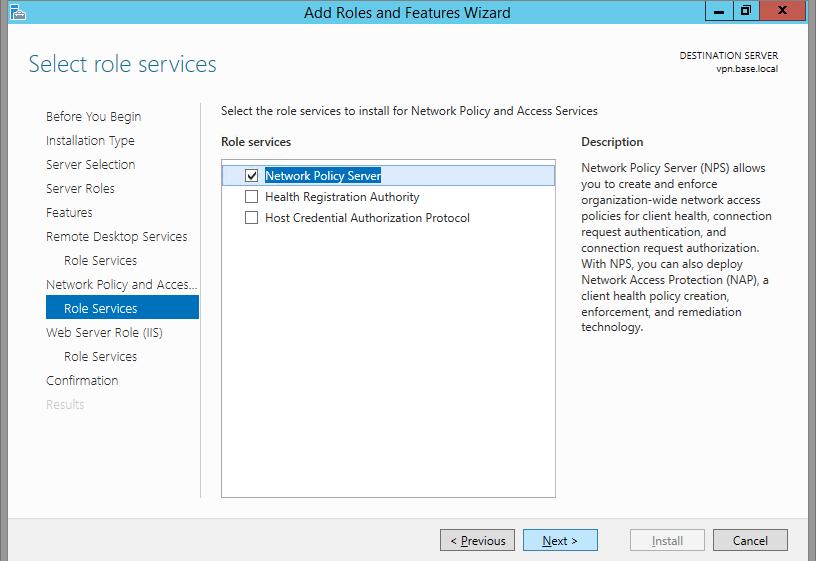
Step 3
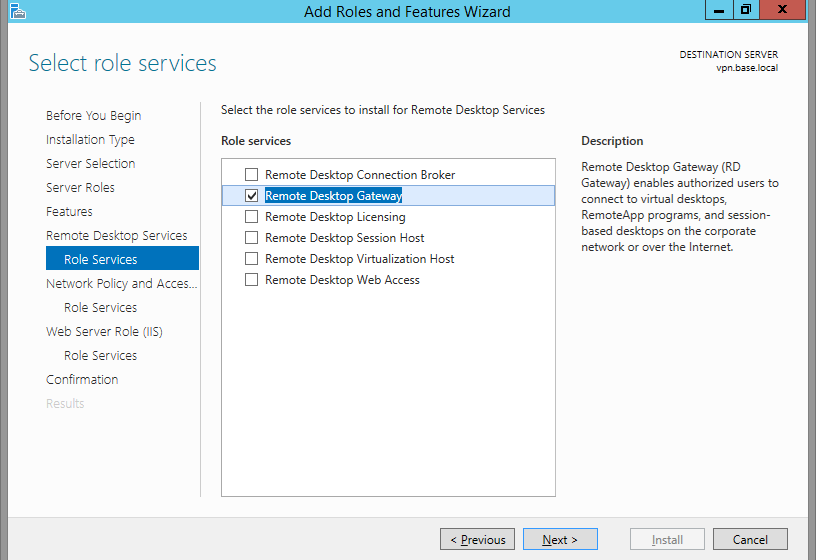
Click next a few times, until you're on the Role Services window. Check only Remote Desktop Gateway.
Step 4
Leave Network Policy Server checked. This will be used to limit the users that can connect, and the resources to which they can connect.
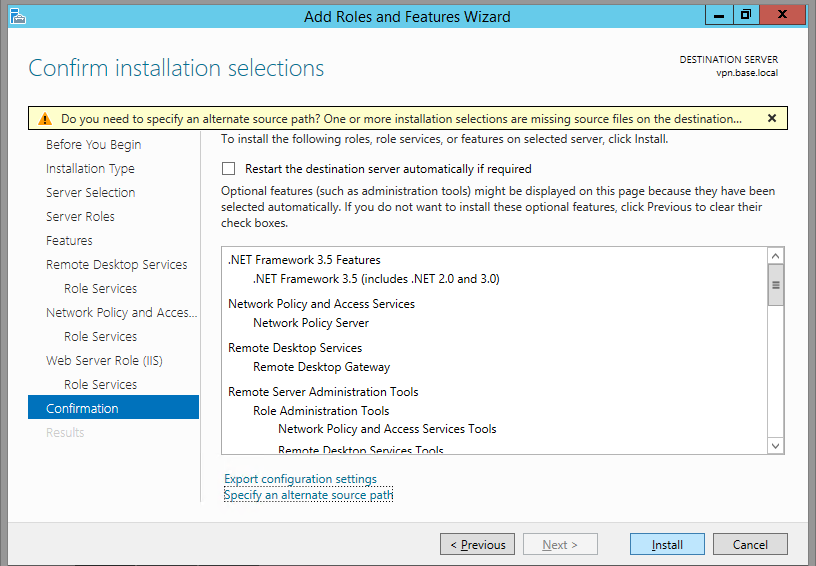
Step 5
When you see the Install confirmation screen, make sure you specify an alternate source path. If the Windows DVD is in drive D:, it'll be at D:\sources\sxs. Click Install
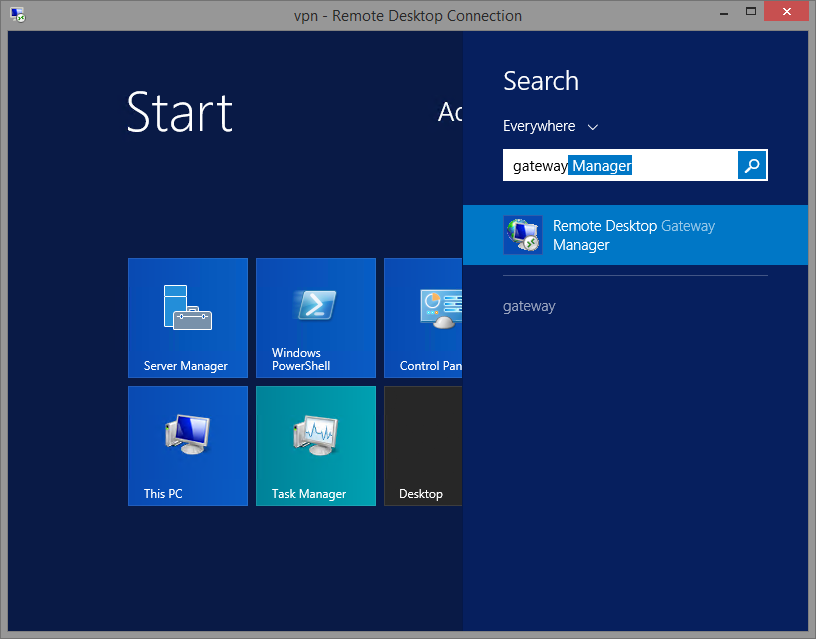
Step 6
Once the install is complete, navigate to Remote Desktop Gateway Manager.
Step 7
Right click on your server name, and click Properties.
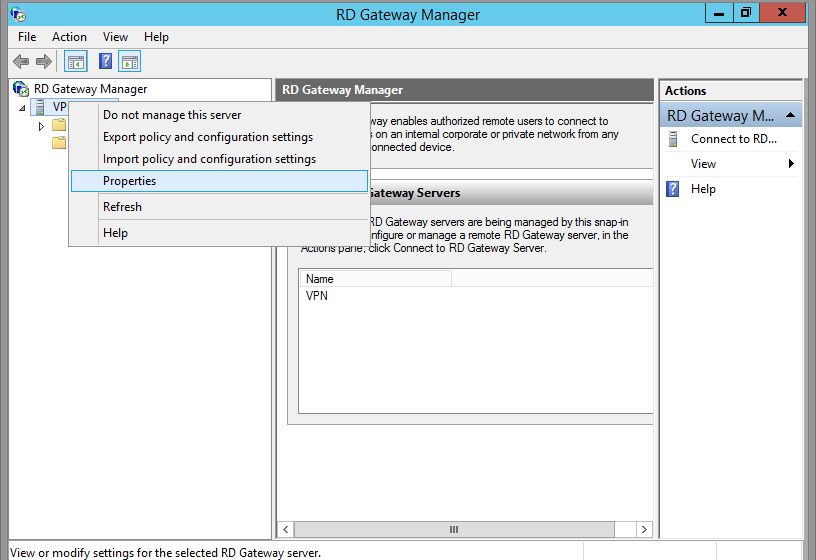
Step 8
Navigate to the SSL Certificate tab. Click Import Certificate.
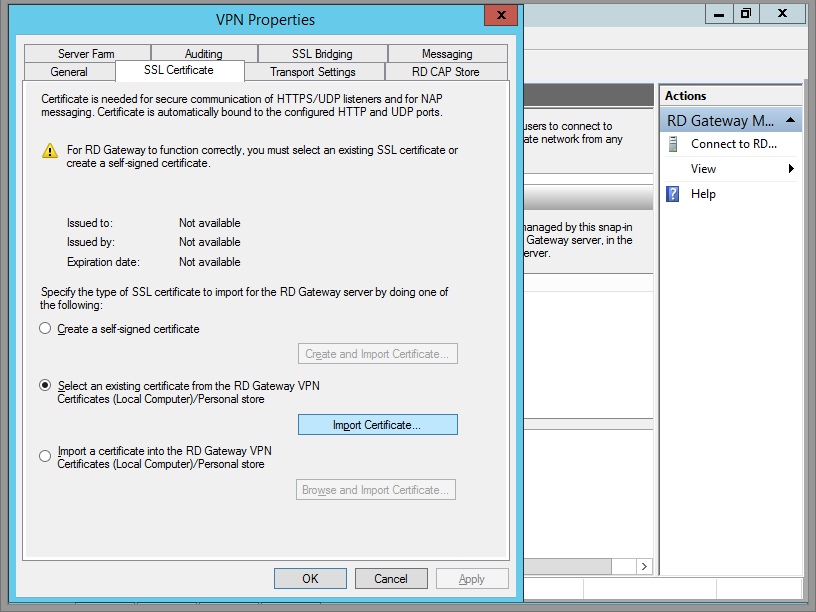
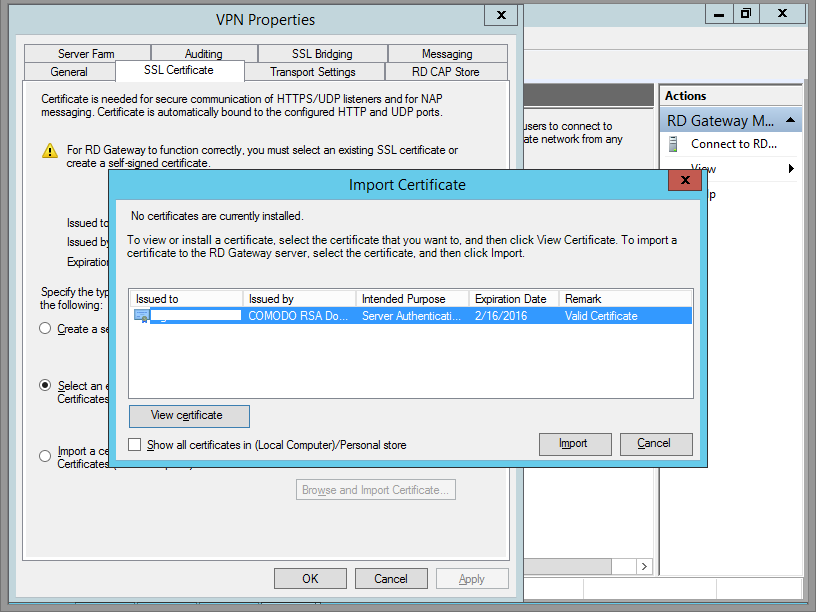
Step 9
Once you've selected your certificate, click Import.
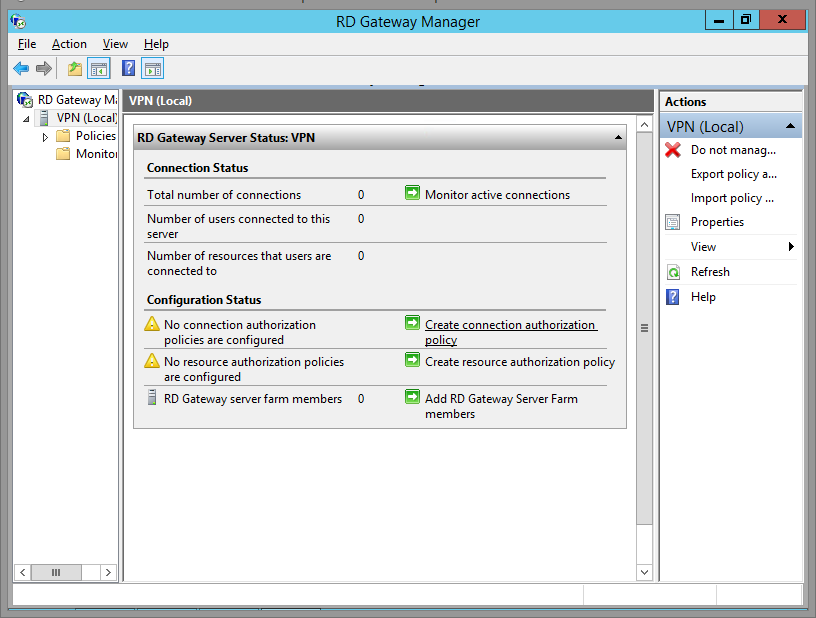
Step 10
Now you'll be brought back to the RD Gateway Manager main window. Click on your server name. My server name is VPN. Whoops! Should have renamed that before taking screenshots. Don't worry, it shouldn't say VPN anywhere, unless that's what you named your server, too.
Click on Create Connection Authorization Policy.
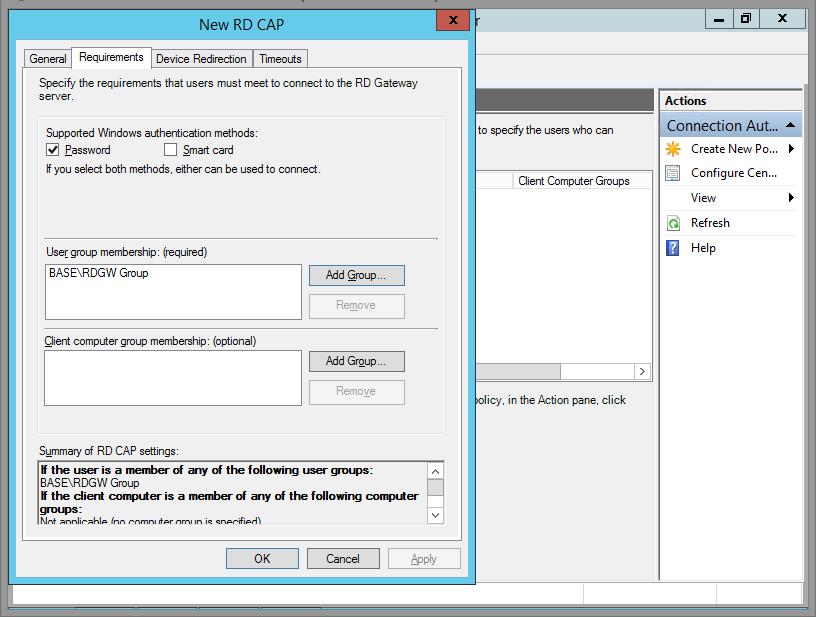
Step 11
If you haven't created an RD Gateway User Group in AD, do it now. Or use Domain Users, Domain Admins or whatever you wish.
Step 12
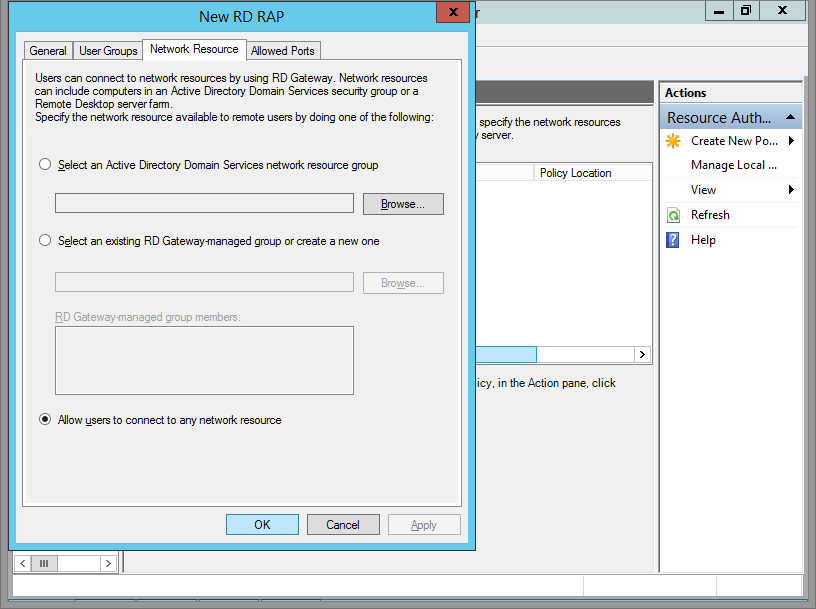
Now you'll be brought back to the RD Gateway Manager main window. Click on Create Resource Authorization Policy.

Step 13
Click the Network Resource Tab and select whatever you wish. Because this is my lab, I allowed users to connect to any network resource.
Step 14
Click OK and now you're all setup!
In your router, forward port 443 not port 3389 to your Remote Desktop Gateway Server. Remember that this is RD Gateway over SSL, and that happens over port 443. Changing the port is possible, but not covered in this tutorial.
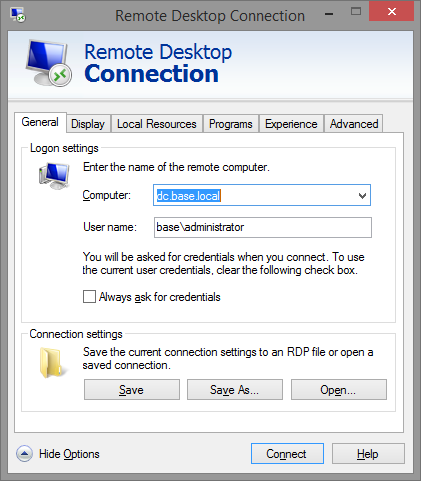
Step 15
Now setup your client. Because RD Gateway will be performing the connections for you, local network names will resolve no matter where you connect from. Enter in a local network server name. You don't have to use the FQDN, but I do.
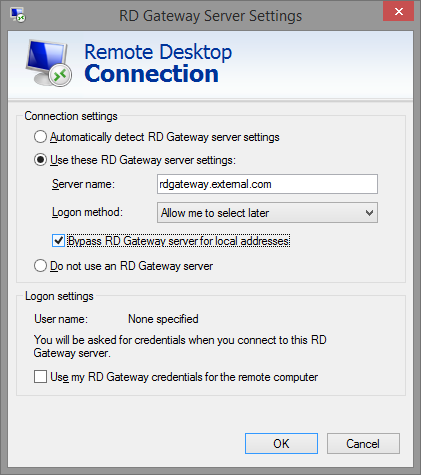
Step 16
Click the Advanced tab, click Use these RD Gateway Server Settings. Enter the DNS name that's associated with your SSL certificate.
Done!
Click connect and bask in the glory of secured RDP communications.