SSH Tunneling for Windows People: Protecting Remote Desktop
NOTE: If you're using Windows 10 Fall Creators Update, please follow this article instead.
The recent OS X High Sierra iamroot vulnerability reminded me just how many people don't secure their remote desktop connections.
While Windows Remote Desktop is more secure than VNC, neither RDP, ARD nor VNC should be directly exposed to the Internet.
Securing RDP
My favorite way to secure RDP is RD Gateway which uses SSL for encryption.
But another way to secure remote connections is SSH tunneling. SSH Tunneling is not as complex as it sounds; setup is basically this:
- Setup an SSH Server, be it on Windows, OS X or Linux
- Setup port forwarding on your router to that SSH port
- Setup your SSH client to forward a local port (12345) to a remote port (sql2016:3389)
- Connect Remote Desktop Client to localhost:12345 which connects to sql2016
In order to introduce the concept, we'll set this up using Windows. Once you're comfortable with the concept, you're free to branch out to use other versions of OpenSSH Server, like the ones that come with OS X or Linux.
Installing the SSH Server
First, bash for Windows must be setup. This requires Windows 10 or Windows Server 2016.
Note: this was written for Windows 10 pre-1709. Apparently, the new update contains a ton of changes. Developer mode is not required and you install your Linux distro from the Windows Store. Seems that it may even include Open SSH right out the box. I'll test on Tuesday and let you all know. Till then, here is how to do it if you've got Windows 10 without Fall Creators Update (FCU).
Enable Developer mode if required
If you haven't enabled Developer Mode yet, do so now.
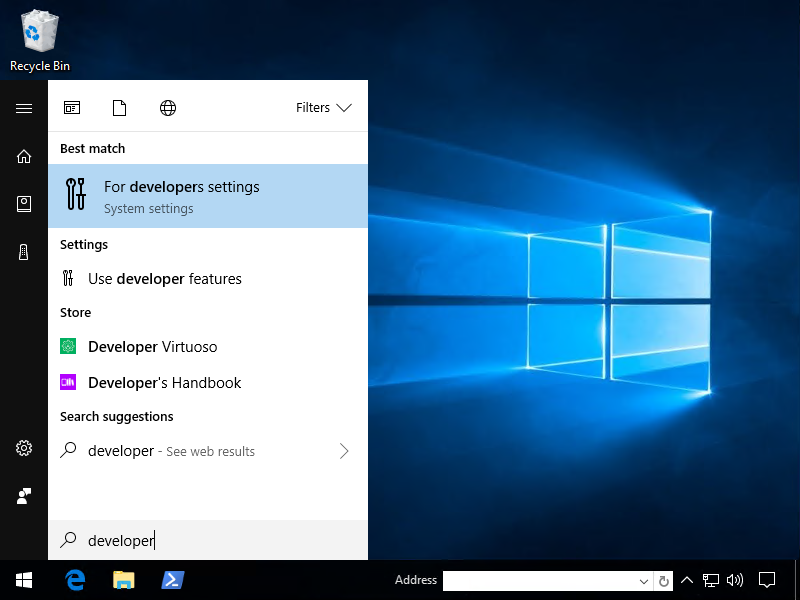
Hit start and type Developer
Click Developer Mode
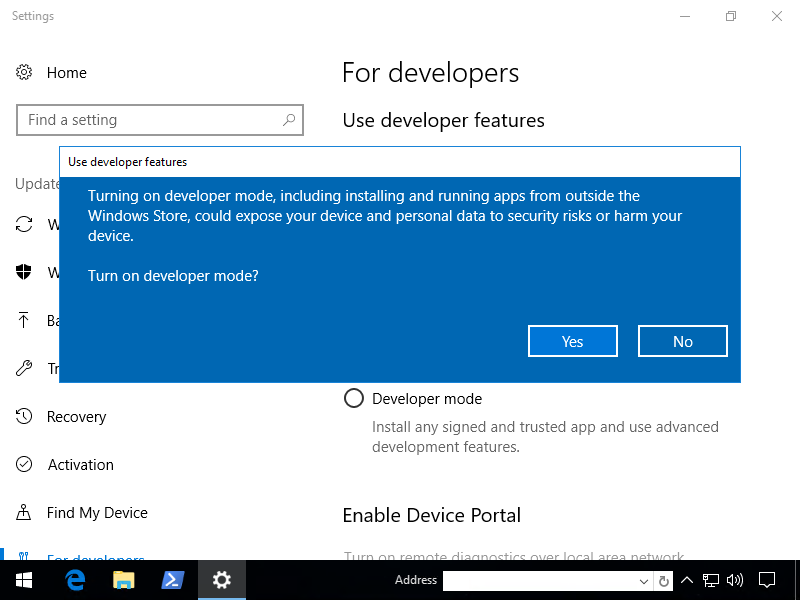
The installation of Developer mode took about 10 minutes on my virtualized workstation.
Install Linux Subsystem
Next, install the Windows Subsystem For Linux feature. You can do so by running PowerShell as admin, then the following two commands:
- New-NetFirewallRule -DisplayName 'SSH Server Inbound' -Direction Inbound -Action Allow -Protocol TCP -LocalPort 22345
- Enable-WindowsOptionalFeature -Online -FeatureName Microsoft-Windows-Subsystem-Linux
You'll then be prompted to reboot. Once you've rebooted, hit Start and type "bash". You should see either a bash app or Bash on Ubuntu on Windows. Click and follow the instructions (and use a strong password).
Excellent, now let's install the SSH Server.
Install, configure and restart OpenSSH Server
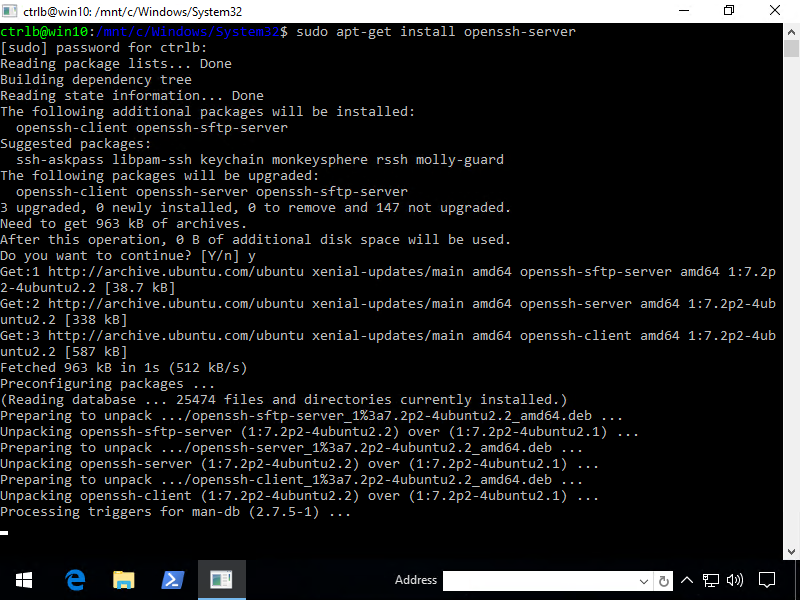
From bash, type the following. Note that sudo means "super user do". It's like Windows UAC, you will have to enter the password you created during setup.
sudo apt-get install openssh-server
Once the SSH server has been installed, you must now edit the SSH configuration file:
sudo vi /etc/ssh/sshd_config
Note that I like vi (mostly because it's available by default on most distros). You are also free to use a more simplified text editor like nano by typing sudo nano /etc/ssh/sshd_config. Anyway, a couple things need to be changed. Two for security and one to let us login using our strong password.
Port 22345 PermitRootLogin no PasswordAuthentication yes
Save your changes and restart the SSH service
sudo service ssh --full-restart
Set up port forwarding on your router
An in-depth tutorial on how to do this is out of scope for this article. Note that whatever you do, don't use the default SSH port, meaning don't forward external 22 to internal 22345.
Bots bang on port 22 all day, every day. This can fill up your logs and maybe even break a shitty password but hopefully you're using a solid password.
Configuring PuTTY
PuTTY is an awesome open source SSH client for Windows that supports SSH tunneling. They have an installer, but I always just download putty.exe.
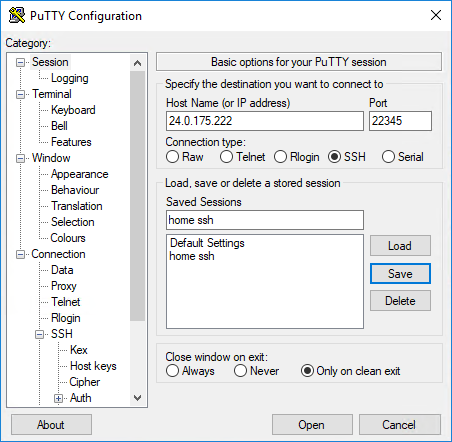
Now let's say your external IP is 24.0.175.222 and you've forwarded port 22345.
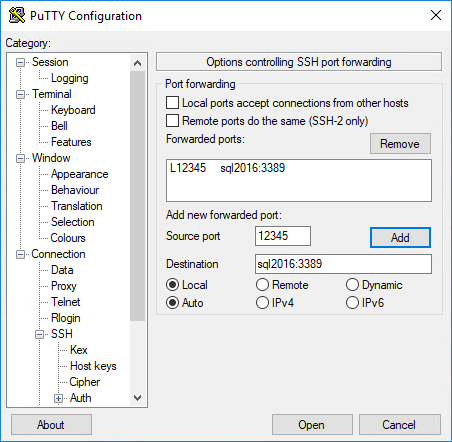
Ok, now on the left, expand SSH then click Tunnels.
The "Source port" is the port you'll be connecting to locally using Remote Desktop Connection. Pick a port that is free. Here, I make it 12345, which connect to my server "sql2016" on the default RDP port, 3389. Now click Add.
Ok, now on the left, go back to Session then name the session and click Save
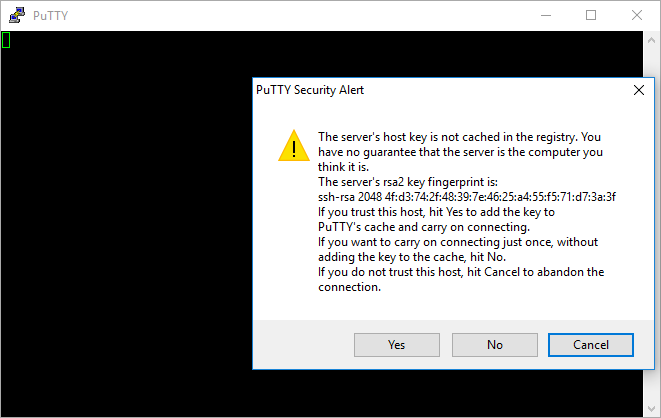
Now Open and say "Yes"
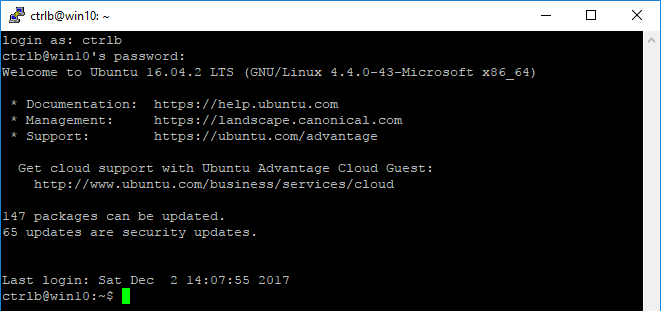
Enter your password when prompted
Once you've made a successful connection, fire up Remote Desktop Connection!
Remote Desktop Connection
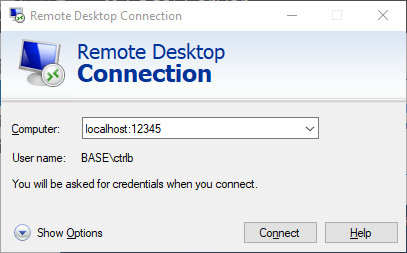
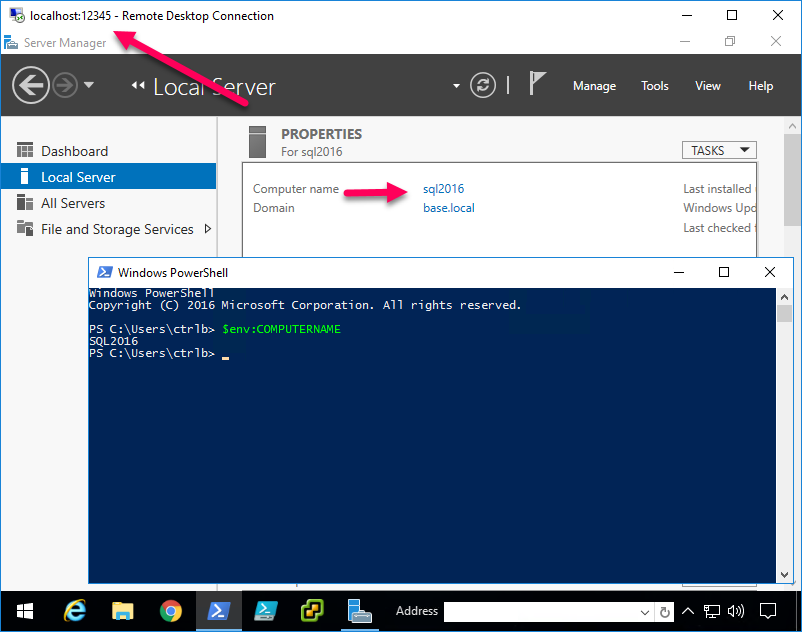
Now for your RDC/mstsc, use localhost:12345 as the hostname. If you recall, this will forward the connection to sql2016:3389.
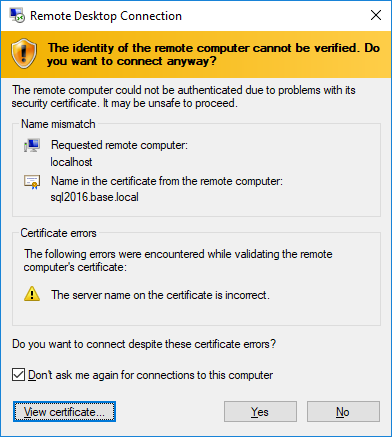
Next, the hostname will be mismatched, of course. So accept it.
And voilà! MAGIC!
Now imagine all of the possibilities of encrypting insecure protocols! You can even jump to an OSX VNC server from here. And it's nice and secure that you just have to open one (encrypted) port to securely gain access to your network.
Couple more things
Now that you've installed Linux on Windows, you should update it.
sudo apt-get update sudo apt-get upgrade sudo apt-get dist-upgrade
Also, I haven't researched how secure Bash on Ubuntu on Windows's OpenSSH server is, but I can't help but think it's easier, more convenient and potentially more secure to setup a "real" SSH server, be it Linux or OS X. Otherwise, Windows' OpenSSH server closes once you close bash.
(To get around this on Windows, it seems that you'll have to set it up as a service or get creative with scheduled tasks.)
In conclusion
If you've been exposing insecure protocols to the net, please consider wrapping them in the loving arms of SSH 💞👍
