SSH Tunneling for Windows: Protecting RDP using Windows 10 Fall Creators Update
NOTE: If you're not yet using Windows 10 Fall Creators Update, please follow this article instead.
The recent OS X High Sierra iamroot vulnerability reminded me just how many people don't secure their remote desktop connections. While Windows Remote Desktop is more secure than VNC, neither RDP, ADP nor VNC should be directly exposed to the Internet.
Securing RDP
My favorite way to secure RDP is RD Gateway which uses SSL for encryption.
But another way to secure remote connections is SSH tunneling. SSH Tunneling is not as complex as it sounds; setup is basically this:
- Setup an SSH Server, be it on Windows, OS X or Linux
- Setup port forwarding on your router to that SSH port
- Setup your SSH client to forward a local port (12345) to a remote port (sql2016:3389)
- Connect Remote Desktop Client to localhost:12345 which connects to sql2016
In order to introduce the concept, we'll set this up using Windows which now includes OpenSSH! Once you're comfortable with the concept, you're free to branch out to use other versions of OpenSSH Server, like the ones that come with OS X or Linux.
Install OpenSSH on Windows 10 Fall Creators Update
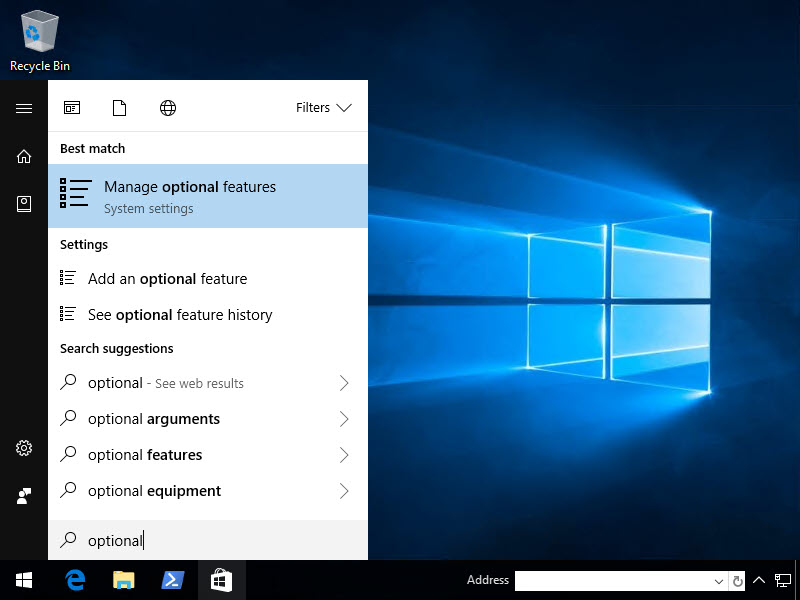
How cool, OpenSSH Server and Client is now built-in to Windows 10 Fall Creators Update! So let's install them. Hit Start then type Optional
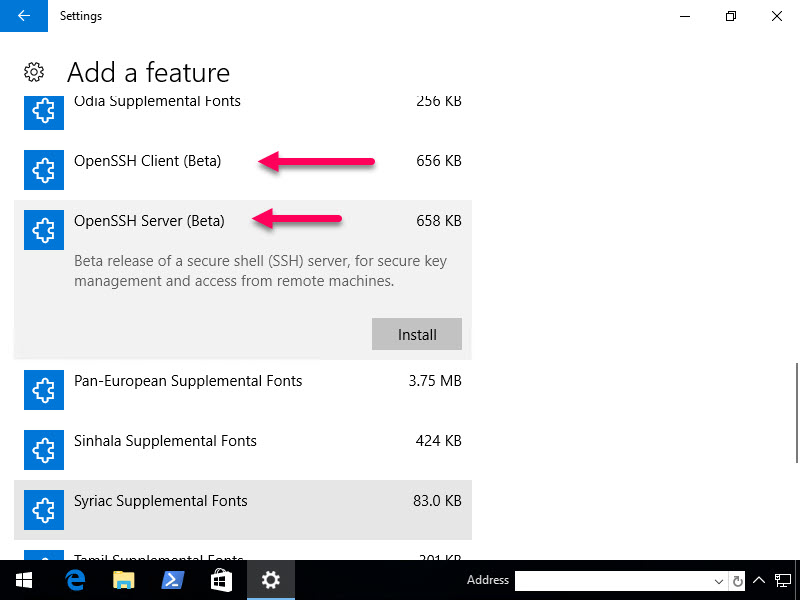
Now install both the Server and the Client
Once you click Install, nothing will really happen. Click the arrow in the upper left hand corner and it'll take you back to the previous page where you can see the features being installed.
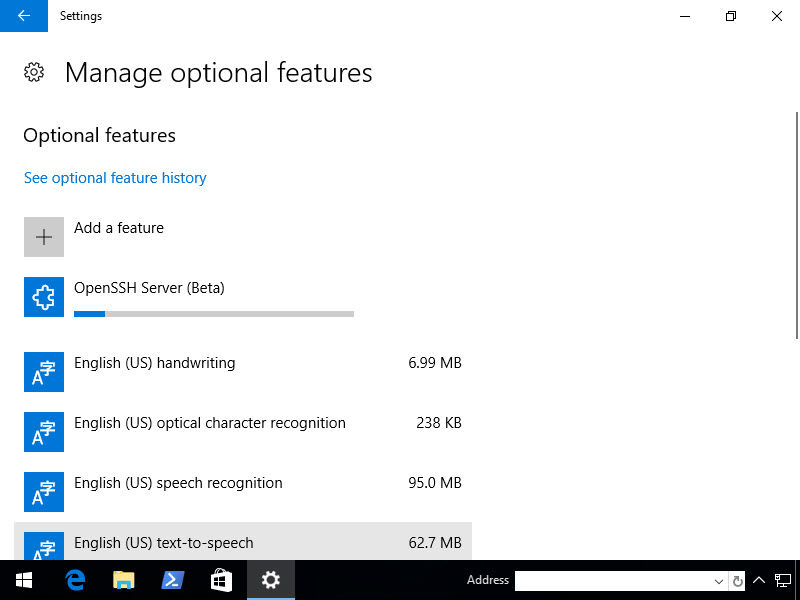
Once the Server and Client have finished installing, you must reboot.
Configure OpenSSH
Gotta say I'm super thankful for Chris K's blog post "Enabling the hidden OpenSSH server in Windows 10 Fall Creators Update (1709) — and why it’s great!", otherwise this would have taken me far longer to figure out.
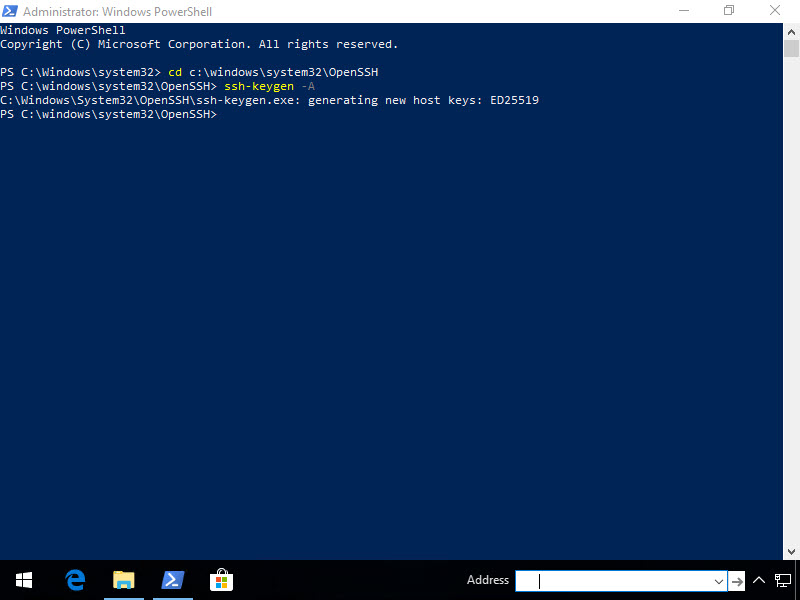
So next, Run PowerShell As Administrator, then generate a key.
cd C:\windows\system32\OpenSSH ssh-keygen -A
Now, we've got to tighten permissions and start the service. Note that if you try to skip this step, the SSH Server will fail to start with "The sshd service terminated unexpectedly."
$filename = "$env:windir\System32\OpenSSH\ssh_host_ed25519_key" $permission = "NT Service\sshd", "Read", "Allow"
$account = New-Object System.Security.Principal.NTAccount("NT Service", "sshd") $accessRule = New-Object -TypeName System.Security.AccessControl.FileSystemAccessRule -ArgumentList $permission $acl = Get-Acl -Path $filename
foreach ($access in $acl.access) { $null = $acl.RemoveAccessRule($access) }
$null = $acl.SetOwner($account) $null = $acl.AddAccessRule($accessRule) $null = Set-Acl -Path $filename -AclObject $acl Get-Service *ssh* | Start-Service
If you encounter issues and need to troubleshoot, Event Viewer won't be of much help. Try C:\windows\system32\OpenSSH\Logs instead.
Security
There doesn't seem to be a lot of documentation on the web on this specific implementation of OpenSSH Server, unfortunately. There is an sshd_config in the OpenSSH directory but I couldn't figure out how to edit it (kept getting access denied).
That being said, I didn't make my usual changes to the config file and, since it's all commented it, I don't even know what configuration it's running with, so I'm trusting Microsoft on this for now.
Set up port forwarding on your router
An in-depth tutorial on how to do this is out of scope for this article. Note that whatever you do, don't use the default SSH port, meaning don't forward external 22 to internal 22.
Bots bang on port 22 all day, every day. This can fill up your logs and maybe even break a shitty password but hopefully you're using a solid password.
Configuring OpenSSH client
Usually, I do this part with PuTTY but here, we'll use the newly available OpenSSH Client.
Now let's say your external IP is 24.0.175.222 (my first broadband IP back in '97), you've forwarded port 22222 to your Windows 10 port 22 and you'd like to connect to domain computer sql2016's RDP port (3389).
ssh -f [email protected] -p 22222 -L 12345:sql2016:3389 -N

Let's break this down (thanks to Frank Wiles for the simplified tutorial).
- -f sends the ssh command to the background so that you don't have to keep PS open
- "chrissy" is a local Windows account on the Windows 10 workstation
- 24.0.175.222 is the public IP
- 22222 is the public port you've published SSH to
- -L is local port, so localhost:12345 will be forwarded sql2016:3389
- -N instructs OpenSSH to not execute a command on the remote system
Once you've made a successful connection, fire up Remote Desktop Connection!
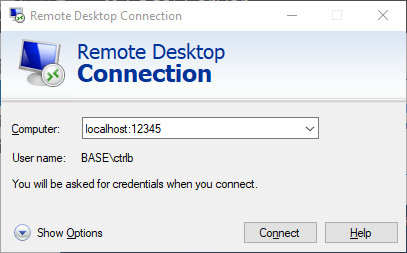
Remote Desktop Connection
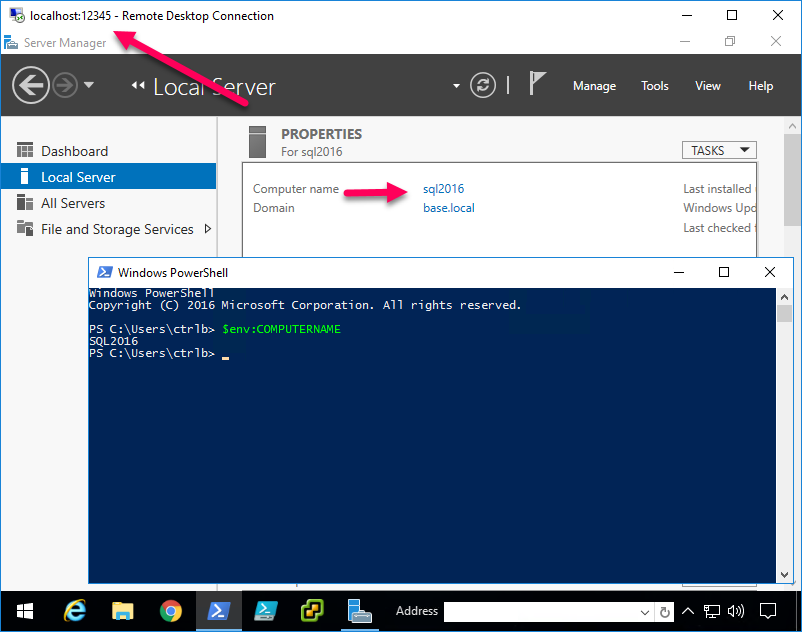
Now for your RDC/mstsc, use localhost:12345 as the hostname. If you recall, this will forward the connection to sql2016:3389.
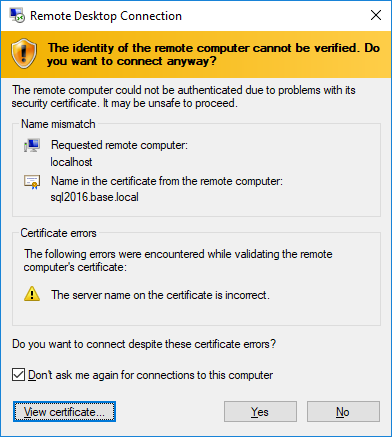
Next, the hostname will be mismatched, of course. So accept it.
And voilà! MAGIC!
Now imagine all of the possibilities of encrypting insecure protocols! You can even jump to an OSX VNC server from here. And it's nice and secure that you just have to open one (encrypted) port to securely gain access to your network.
In conclusion
If you've been exposing insecure protocols to the net, please consider wrapping them in the loving arms of SSH 💞👍