Migrating my WordPress sites to GitHub Pages
Edit: Nevermind! Just follow Kendra Little's blog post if you're looking to move from WordPress to another platform. Doing it the way this tutorial suggests makes it impossibly hard to add new posts.
After getting hacked one too many times, I've decided to move all of my blogs and URL-shortening sites from a Virtual Private Server to GitHub Pages.
GitHub Pages are pretty awesome and I'm not using them to their fullest ability, but so far, it's been a great replacement for WordPress. While I procrastinate a total transition to Jekyll and markdown, I'm writing posts on a local backup of my WordPress blog then performing an export to GitHub each time.
I've been on Pages for a little less than a week and it's already been a huge relief not to worry about my blog going offline anymore because my VPS got super hacked because I wasn't on top of updating WordPress or PHP.
Here are some other pros to moving to GitHub Pages:
- Super fast since everything is static
- Built-in CDN since GitHub takes care of all that
- Free
- Writing markdown files is a fun way to blog
- No more Gutenberg editor!
There are some downsides, of course.
- Forms POST to local site forbidden, so no built-in search or commenting
- Can't figure out how users can still subscribe via Jetpack
- Coordinating new posts by guest authors will be a challenge
- WordPress plugins are really useful and I'll have to learn a bunch of new stuff to replace what they offer
- Unlike with WordPress and Jetpack, stats aren't offered statically
Even with these cons, I regret not migrating to static pages years ago but no other platform has been appealing until now. I like the GitHub workflow and Pages feel pretty familiar. I've actually used them before - shoutout to the dbatools team for the intro! We use Pages for docs.dbatools.io and I was basically forced to understand it to keep supporting docs.
Here's how I did it
It's been a process so I wanted to distill it in a post. This post assumes a small amount of familiarity with GitHub so I'll be skipping over the basics.
Enable GitHub Pages
To begin, create a fresh new repo and initialize it with a README.md if you want.
Then, enable GitHub Pages in repository Settings.
If you want to use a custom domain name, it's a straightforward, three-step process. I'll show you how to do it after you export your blog and commit it to your repository.
Exporter Plugin
In order to begin my migration, I had to find the right WordPress plugin. The plugin had to:
- actually work (tall order, it seems!)
- look exactly the same for now
- export only what was needed to prevent bloat
It took a bit but I finally found WP2Static. At the time, it wasn't available in the WordPress plugin gallery; I downloaded the plugin and uploaded it to my site. Update 2025: WP2Static is available in the WordPress plugin directory here: https://wordpress.org/plugins/wp2static/.
At first, I tried to commit straight to GitHub but I guess I had too many files. I found the most luck just downloading the zip and committing manually.
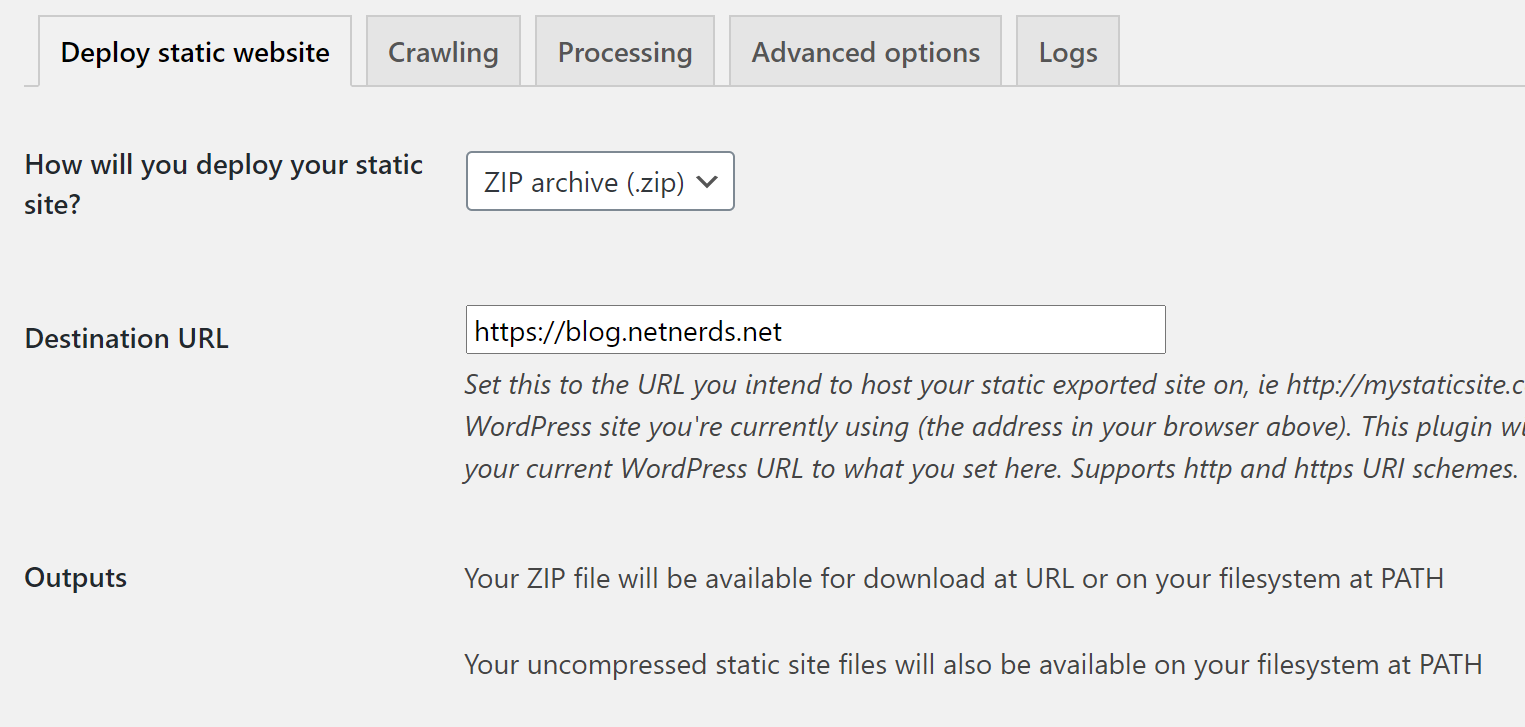
It also said not to use the URL of your current blog, but I did. I considered a subdomain name change but decided against it. When I need to compose and export nowadays, I just modify my HOSTS file.
My site is pretty big and exporting takes quite a while to export each time. I'd say 30 minutes or so. It's a big time investment, but recovering from constant hacks is an even bigger, more stressful timesuck.
I tried messing with the Advanced options that can speed up the export but even though I have a dedicated VPS and resources, found it'd mess up if I went too high. In the end, I just kept the defaults.
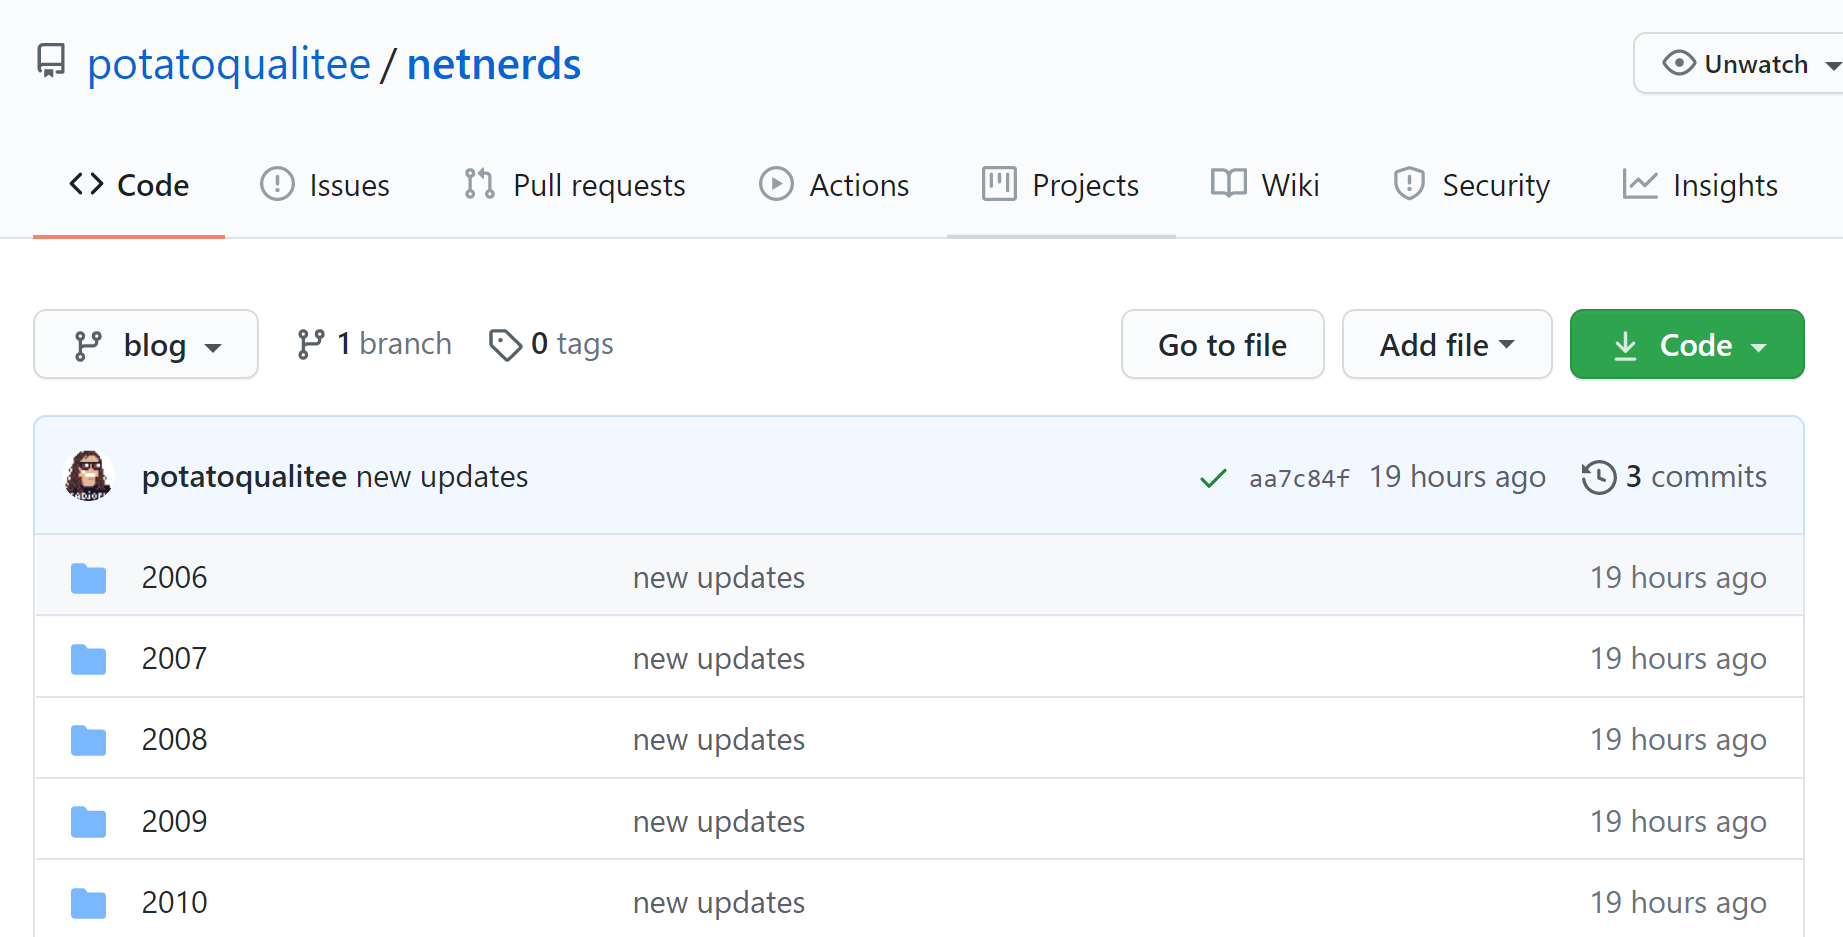
Once my export was done, I committed all the exported HTML files to my newly created GitHub Pages–enabled repo.
Awesome, time to update my DNS settings!
Before exporting
Oh, turns out I should have done a couple other things before updating DNS.
Google Analytics
My site already had Google Analytics, but I wanted to highlight it for others who rely solely on WordPress stats. You can add Google Analytics to your site using a WordPress plugin, a Cloudflare integration, or by manually adding it to your theme like I did.
Once I migrate fully to GitHub Pages and use markdown and Jekyll to do my blog, Google Analytics is easily supported, too. Looks like it's just adding a file to the _includes directory.
So before your "final" exports, make sure you have your Analytics set up and ready for the exporter to write to file.
Migrate comments to Disqus
After my initial export using WP2Static, I posted a test comment which failed because it attempted to POST to my own domain which is unsupported/forbidden in GitHub Pages. This means that I've gotta setup support for comments prior to my final migration.
Considering I can't POST to my own site, I realized that I'd have to find a plugin and platform which posted somewhere else and included that in the exported HTML code. Fortunately, it was pretty easy using Disqus.
I tried a couple plugins and ended up going with the official Disqus plugin for WordPress: https://wordpress.org/plugins/disqus-comment-system/. I had to create an account, create an API key then export/import old comments and all-around, I'm happy with the result. It actually works!
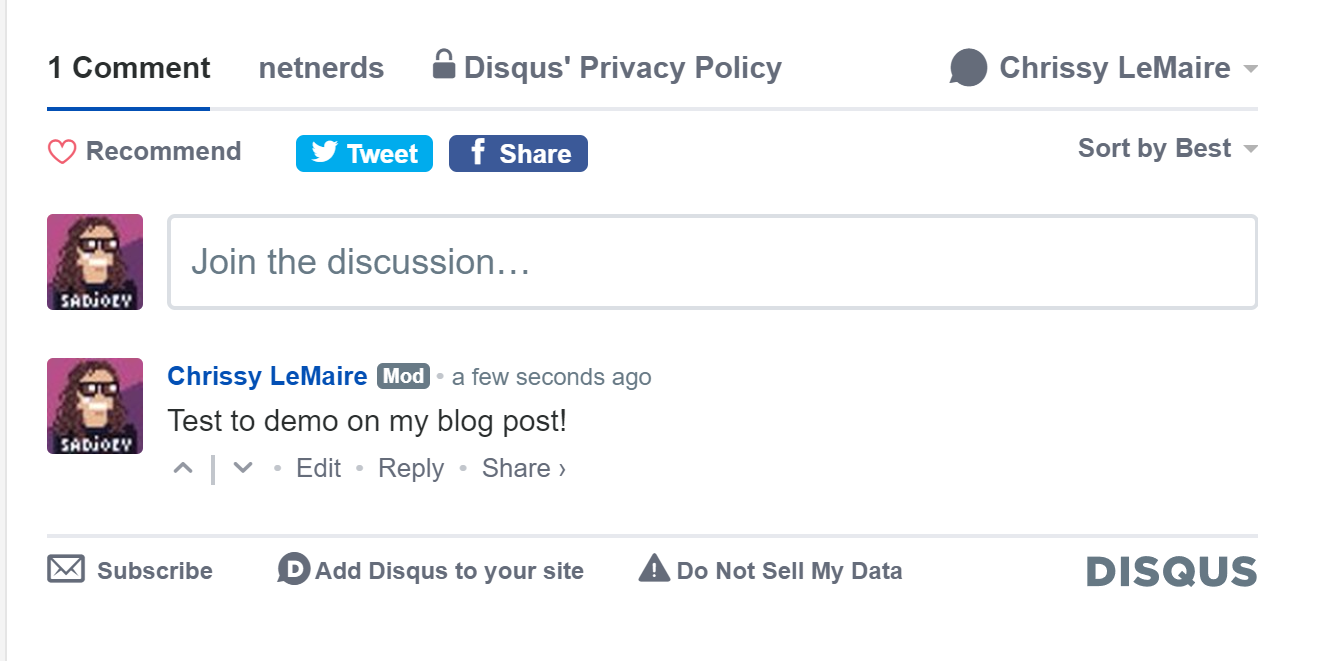
There's me commenting on my GitHub Pages site 🤩
After Exporting
Now that I've got comments and analytics working, it's time to tell the Internet that my blog has moved. I use Cloudflare extensively for this. Cloudflare is a free service that I use for all of my domains. It offers free SSL, a beautiful DNS management interface and some cool Page Rules that replaces a lot of functionality I'd usually pull off with .htaccess.
Cloudflare also supports geo-replication of my media, which means my site is fast no matter where my host is based. This matters less now that my blog is on GitHub Pages and not a VPS in Texas, but I was happy I had it when I did. Especially since it's free.
Add your domain name to the repo
First, let's add support for our custom domain name to GitHub. Do this by adding a file named CNAME (capitalization is important) to the root of your repo that contains the name of your domain. See GitHub's docs: https://docs.github.com/en/pages/configuring-a-custom-domain-for-your-github-pages-site
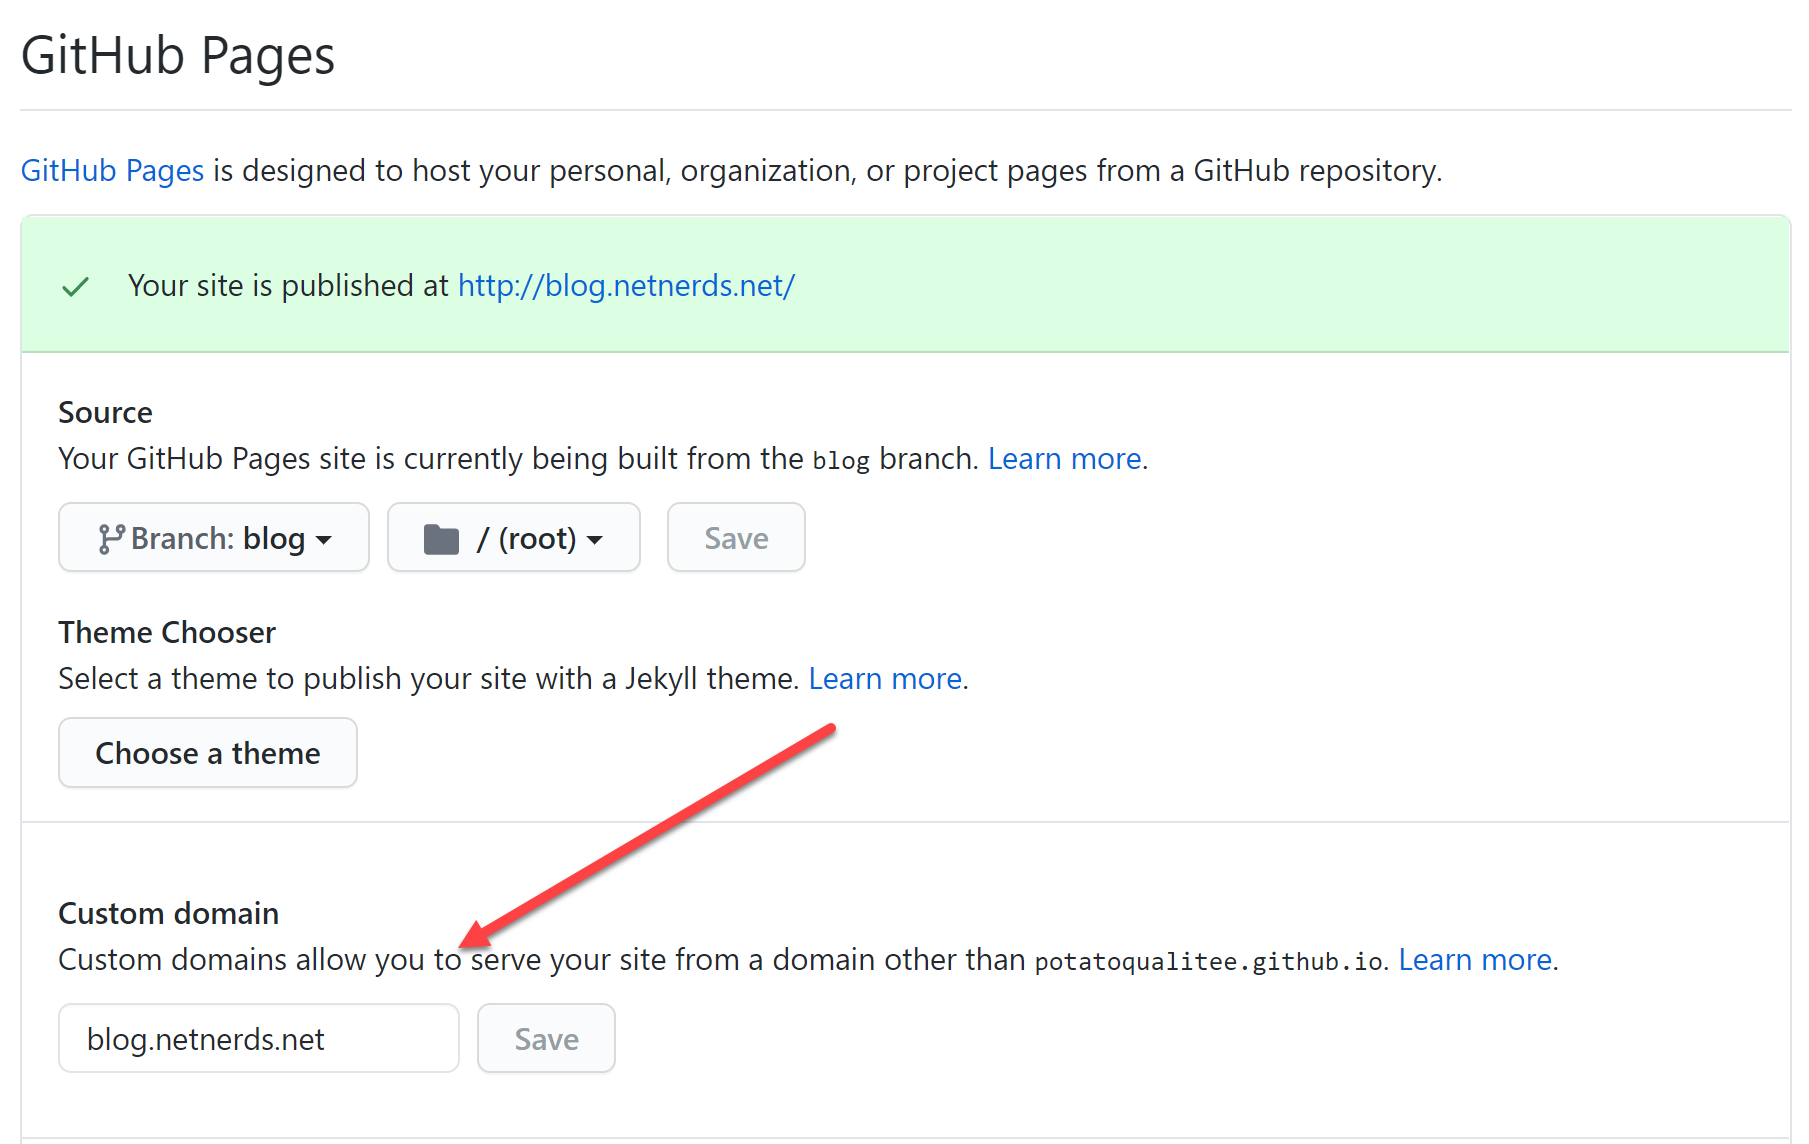
Next, go to the Settings of your repo, and in the section for GitHub pages, add your domain name.
SSL
If you use Cloudflare, SSL is taken care of by default. If you don't, you'll need to add an extra DNS entry to give letsencrypt.org authority to create SSL certs for you. Visit GitHub's troubleshooting page for more information.
DNS
Next, add a CNAME in DNS for your domain. The entry will be yourgithubusername.github.io. Here's mine with my GitHub username, potatoqualitee:

Once that's saved, I quit my browser to clear my DNS cache, and boom, it worked! I was pretty amazed that it looked exactly like my old site too. No messed up CSS or anything 🚀
Search
While the site looked exactly the same, the search didn't work, which I expected.
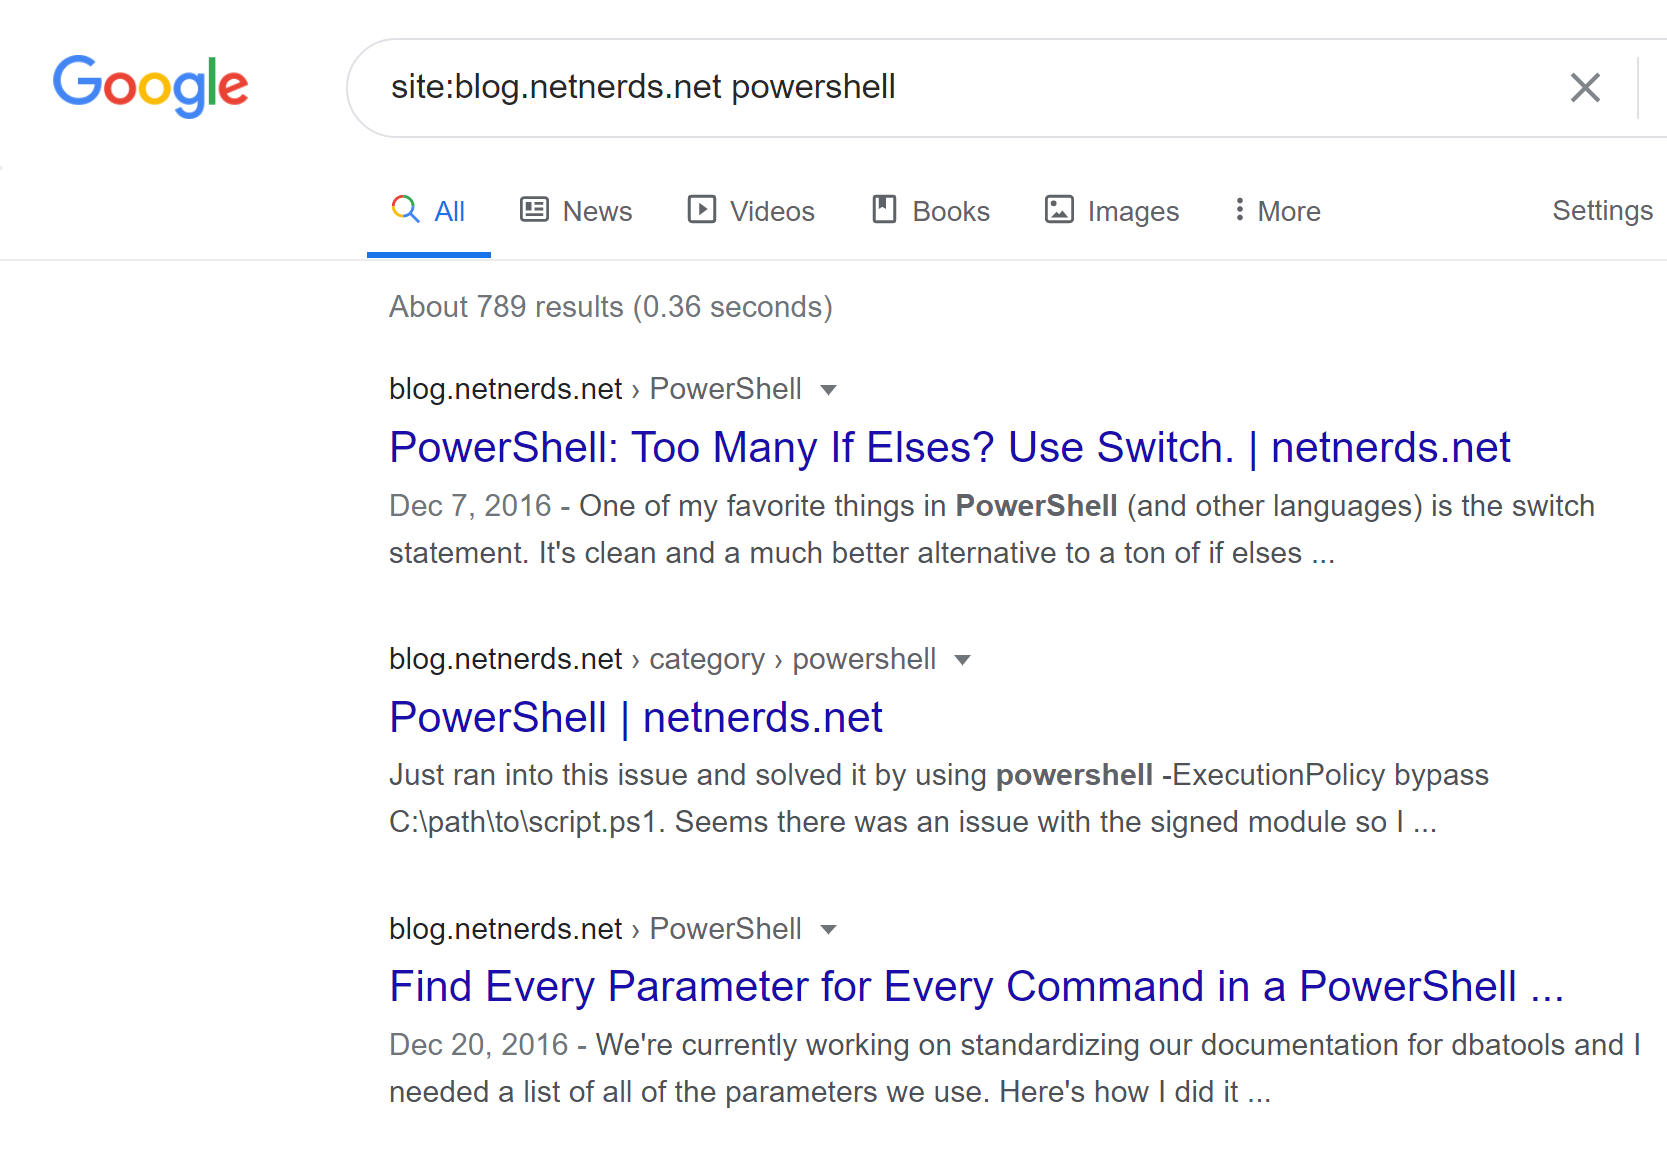
To my knowledge, Jekyll does not support querystrings and search is impossible. Because of this, I used a Cloudflare Page Rule to redirect all searches to Google.
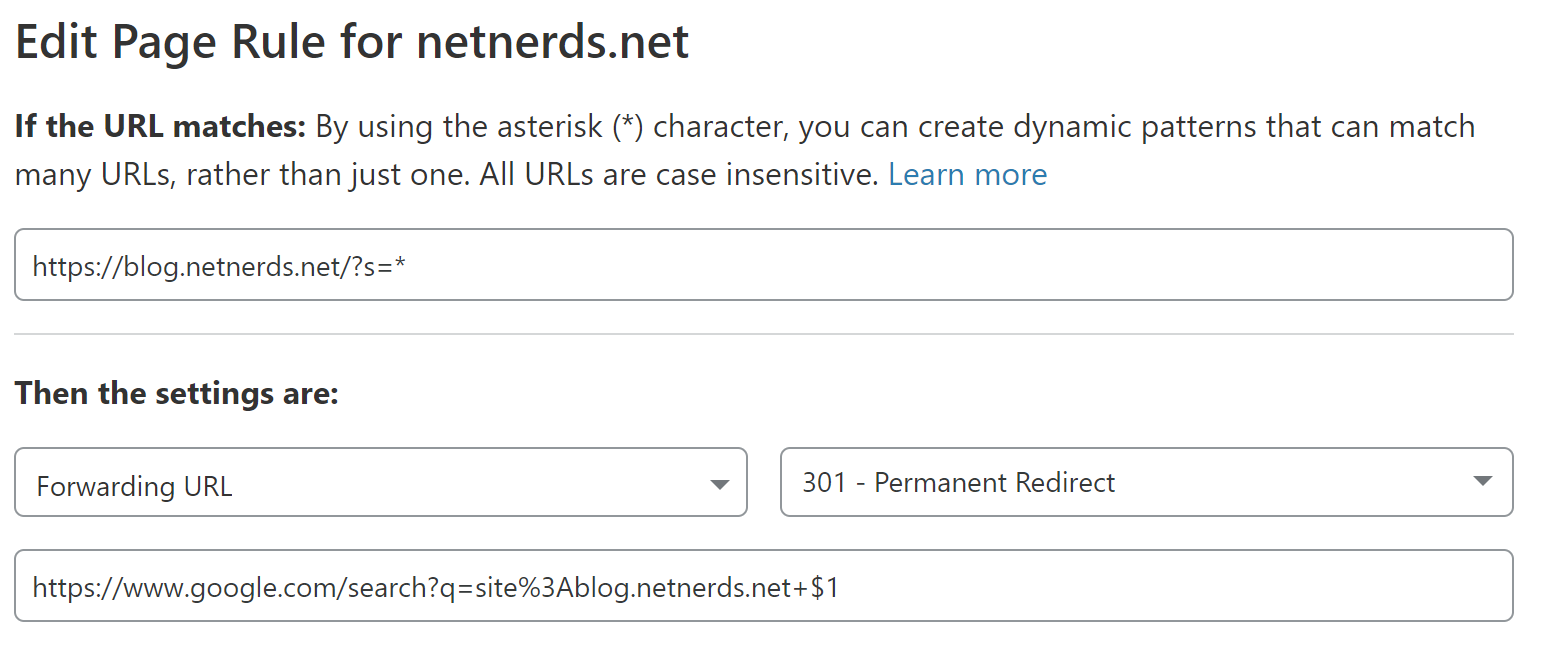
You can try it now by searching the site or by clicking the following link: https://blog.netnerds.net/?s=powershell
Redirects / shortlinks
If you're really into shortlinks like me, that is also supported by GitHub Pages. It doesn't support 301 Permanent Redirects, but it supports HTML redirects which is good enough for me.
I wrote a blog post on how to accomplish this, titled URL Shortening/Redirects using GitHub Pages and Jekyll, if you're looking to do the same.
Now, all that's left is to figure out the subscribers situation and I'll be set until I figure out how to create a Jekyll theme and migrate entirely to markdown!